Powered by Blogger.

Cranberry Orange Ginger Fizz

When I decided I wanted to come up with a fun drink to ring in the new year with, I didn't have too many boxes to check. I wanted it to feel seasonal, and have bubbles.

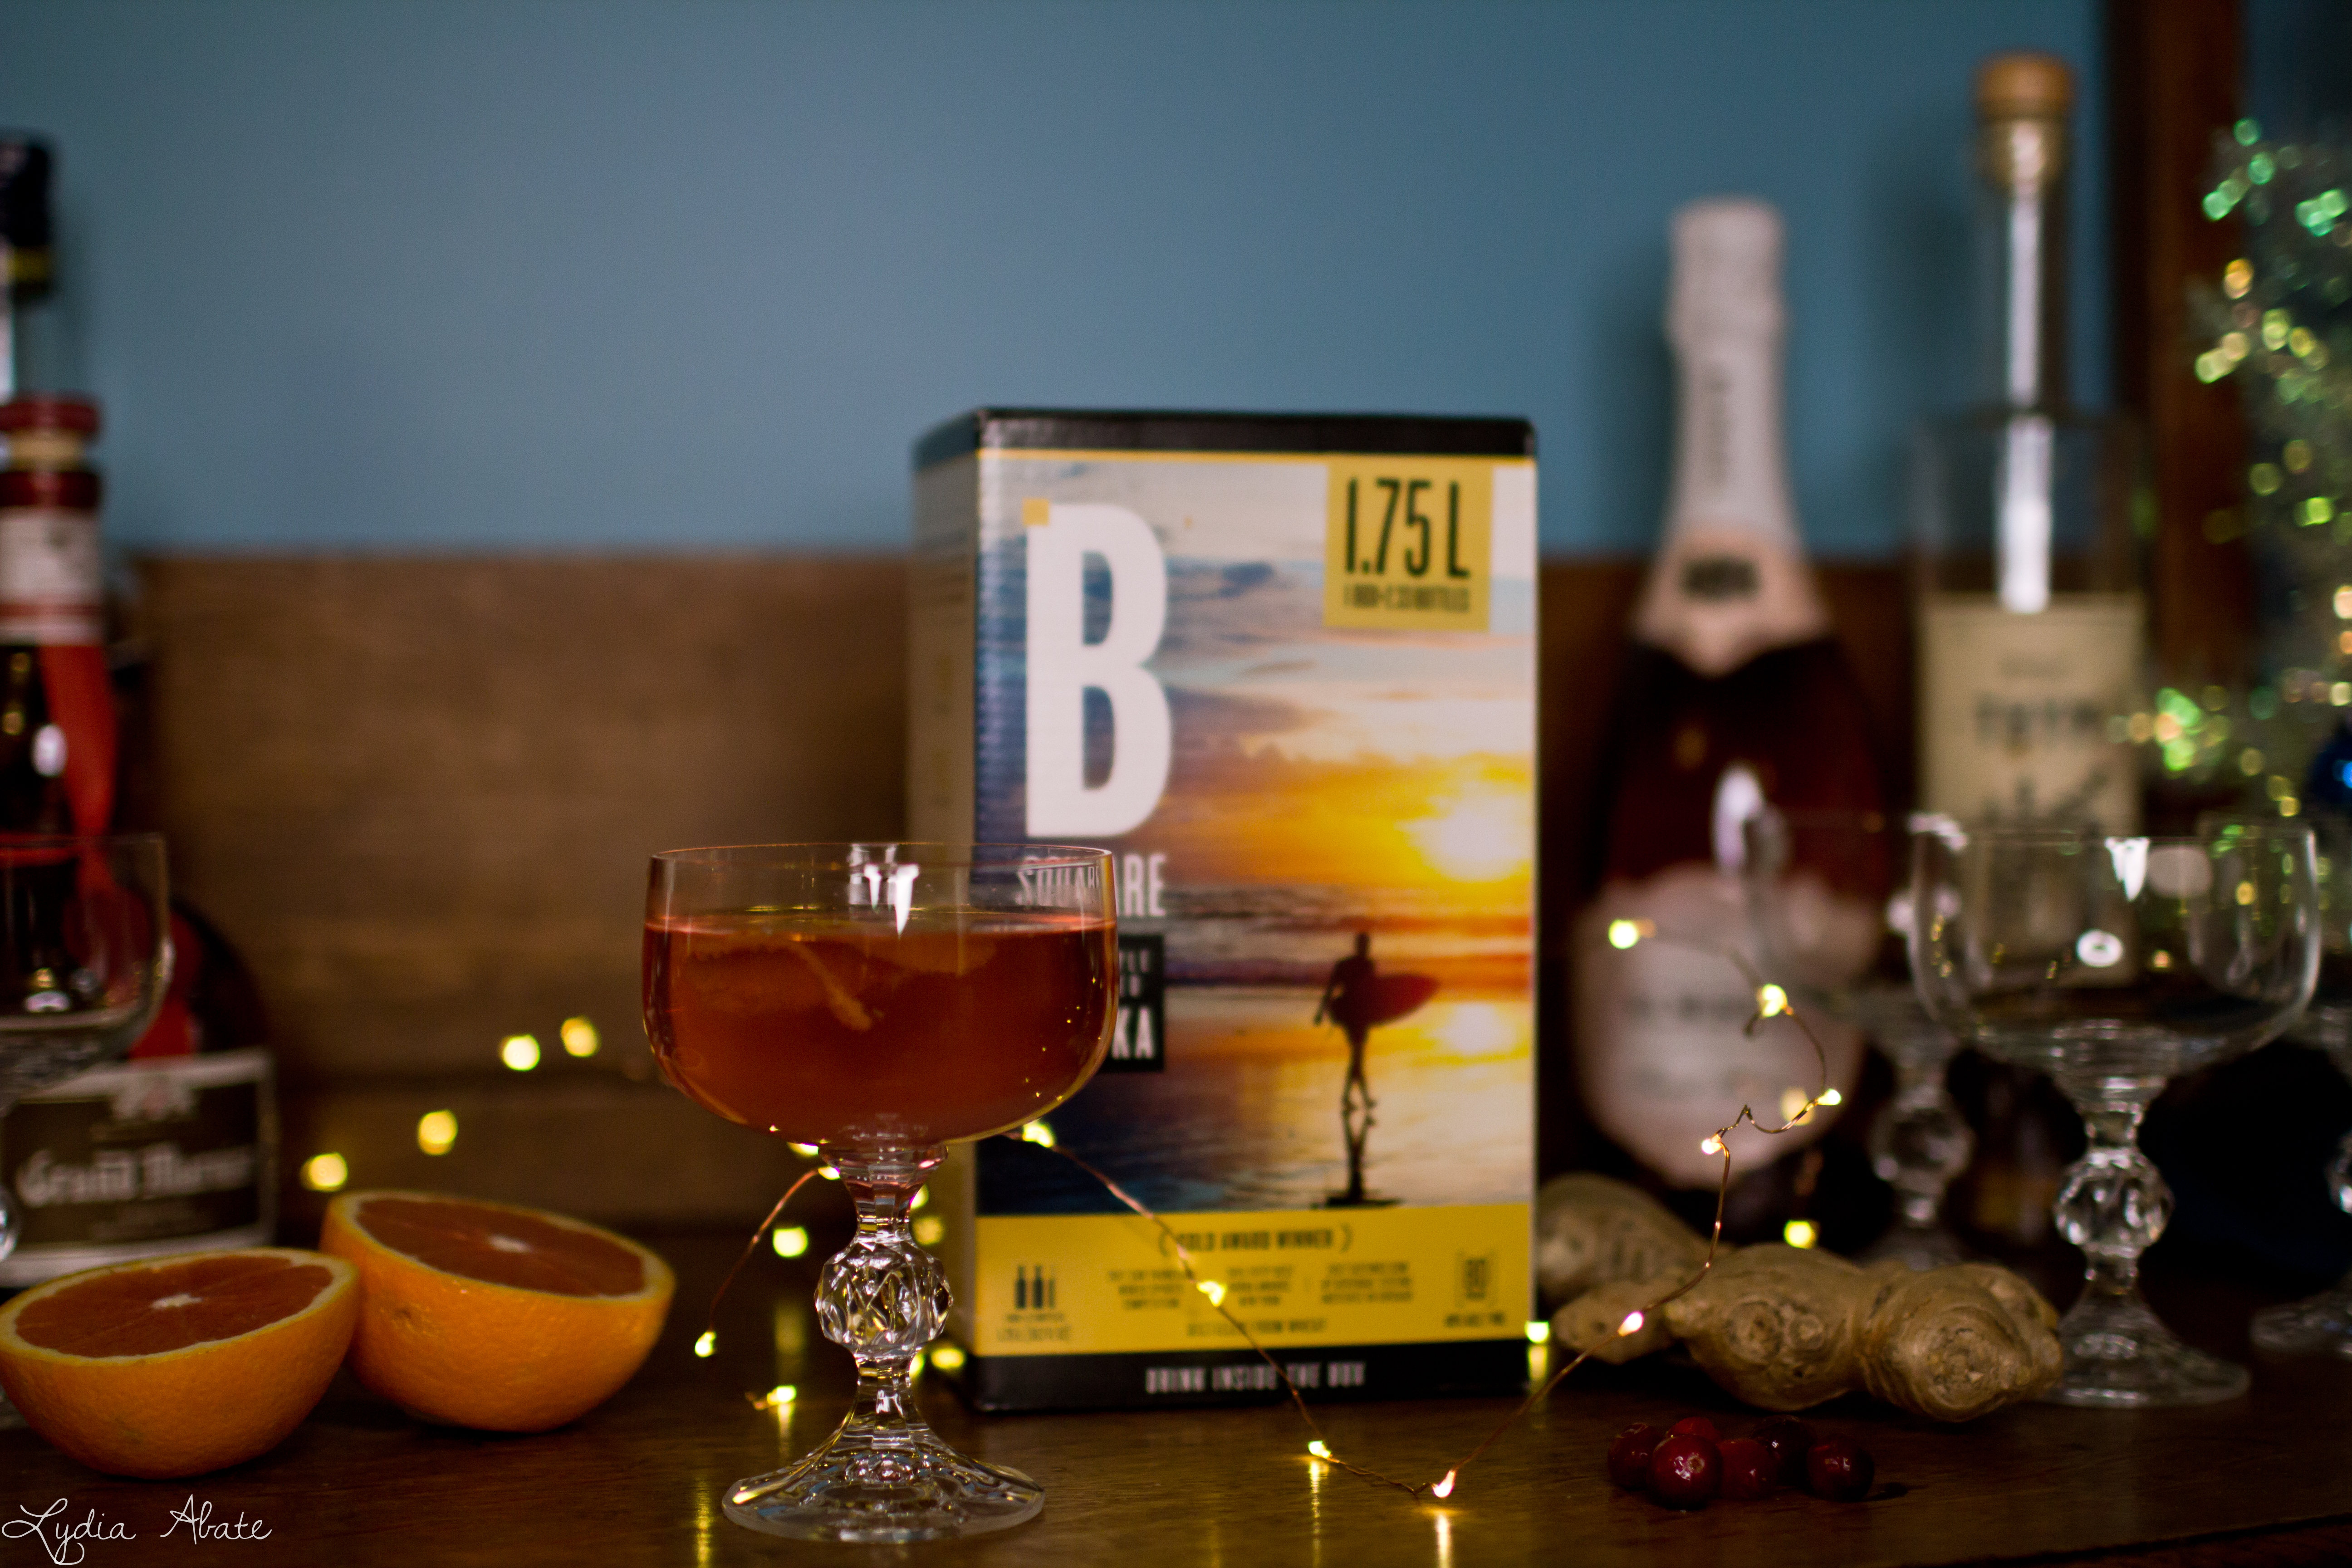
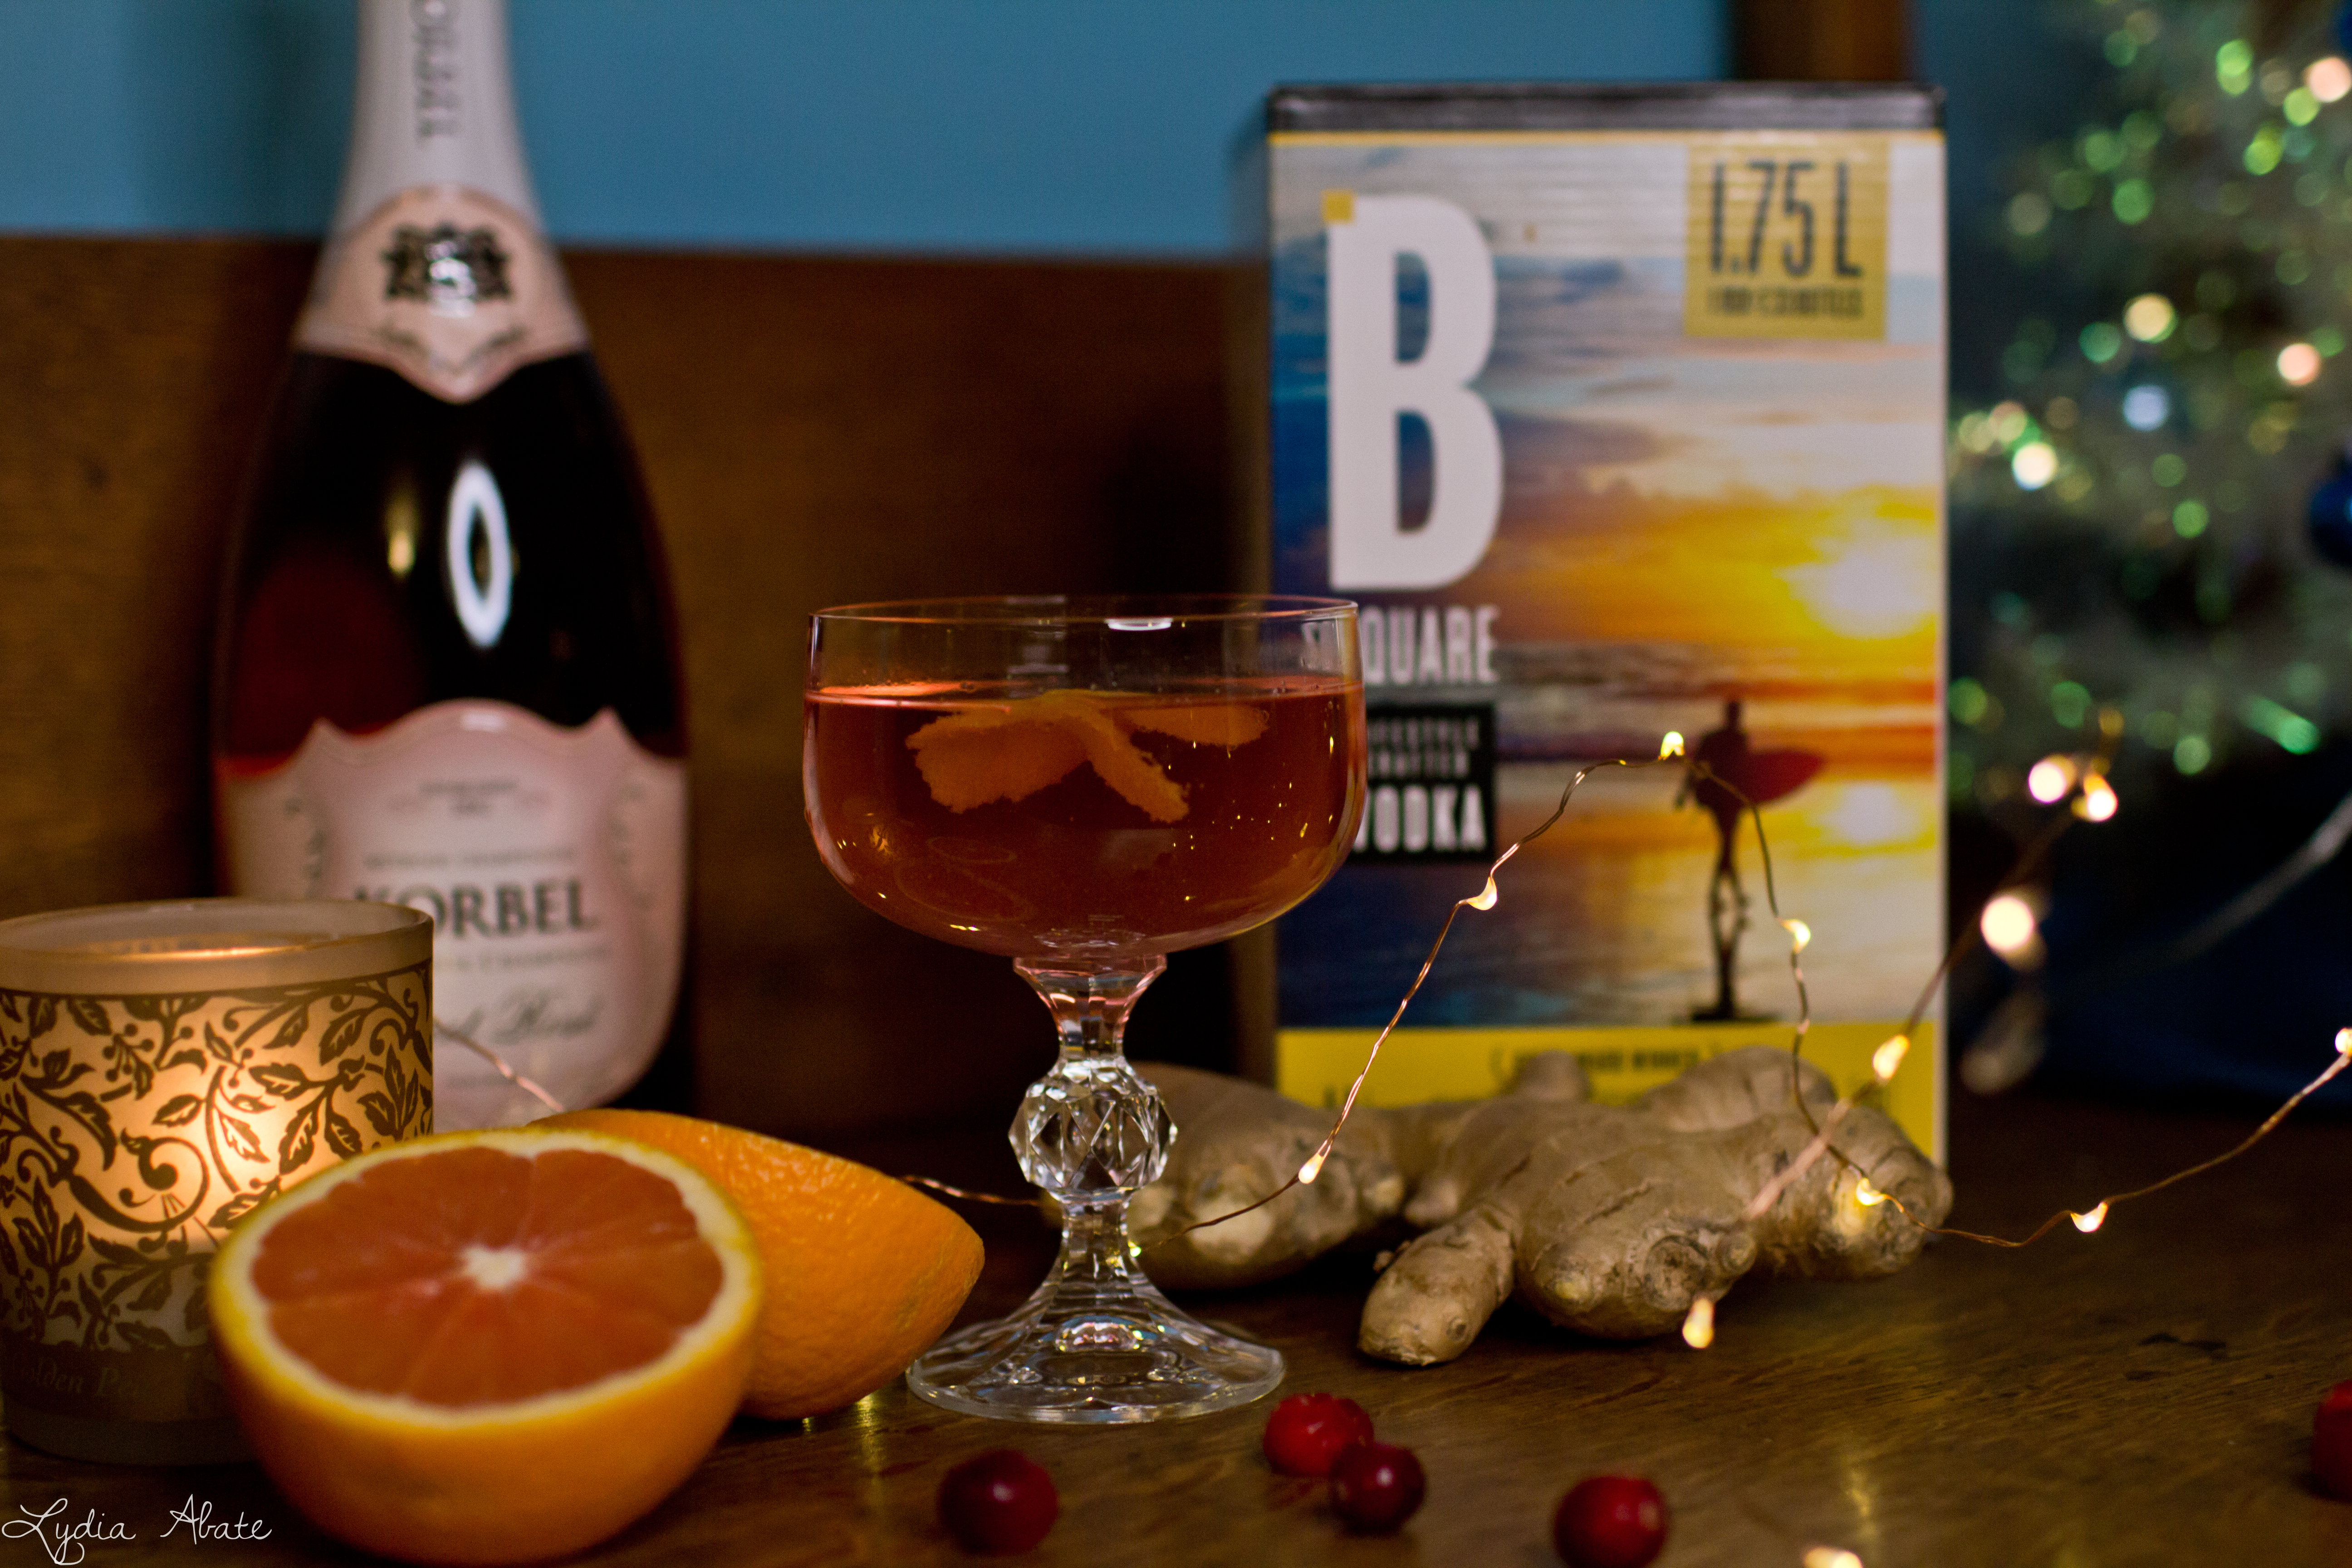
Earlier this month a box of B Square Vodka arrived for me to try out. The companies' logic is simple, by putting their spirits in a portable, non breakable vessel, it becomes ideal for the outdoors. Camping, boating, lounging by the pool, picnics on the beach, anywhere a drink would be fun and broken glass would not.

Considering it's December, and it's quite cold, most of those outdoor activities simply no longer fit as something I would rationally do. So I came up with the idea for a bonfire. Naturally there was the problem of needing a place to have the bonfire and needing at least one other person to be in the photos with me (because who has a bonfire alone?). Fortuitously, my friend Meg volunteered herself, her husband, and her fire pit. There was one evening in December we could make it work, so I got the fire wood, the plastic cups, the simple cranberry mixer and headed over.

The sun was getting low, Meg's husband worked on building up the fire, and then, we couldn't get it started. After an hour of standing out the cold fussing over twigs that just wouldn't catch, we decided the recent rain must have gotten everything too wet and ran out of ideas on how to get it to start.

With the kibosh on the bonfire I decided I'd have to move to plan b, a fun mixed drink, because regardless of the box, vodka is vodka and it might as well be enjoyed.

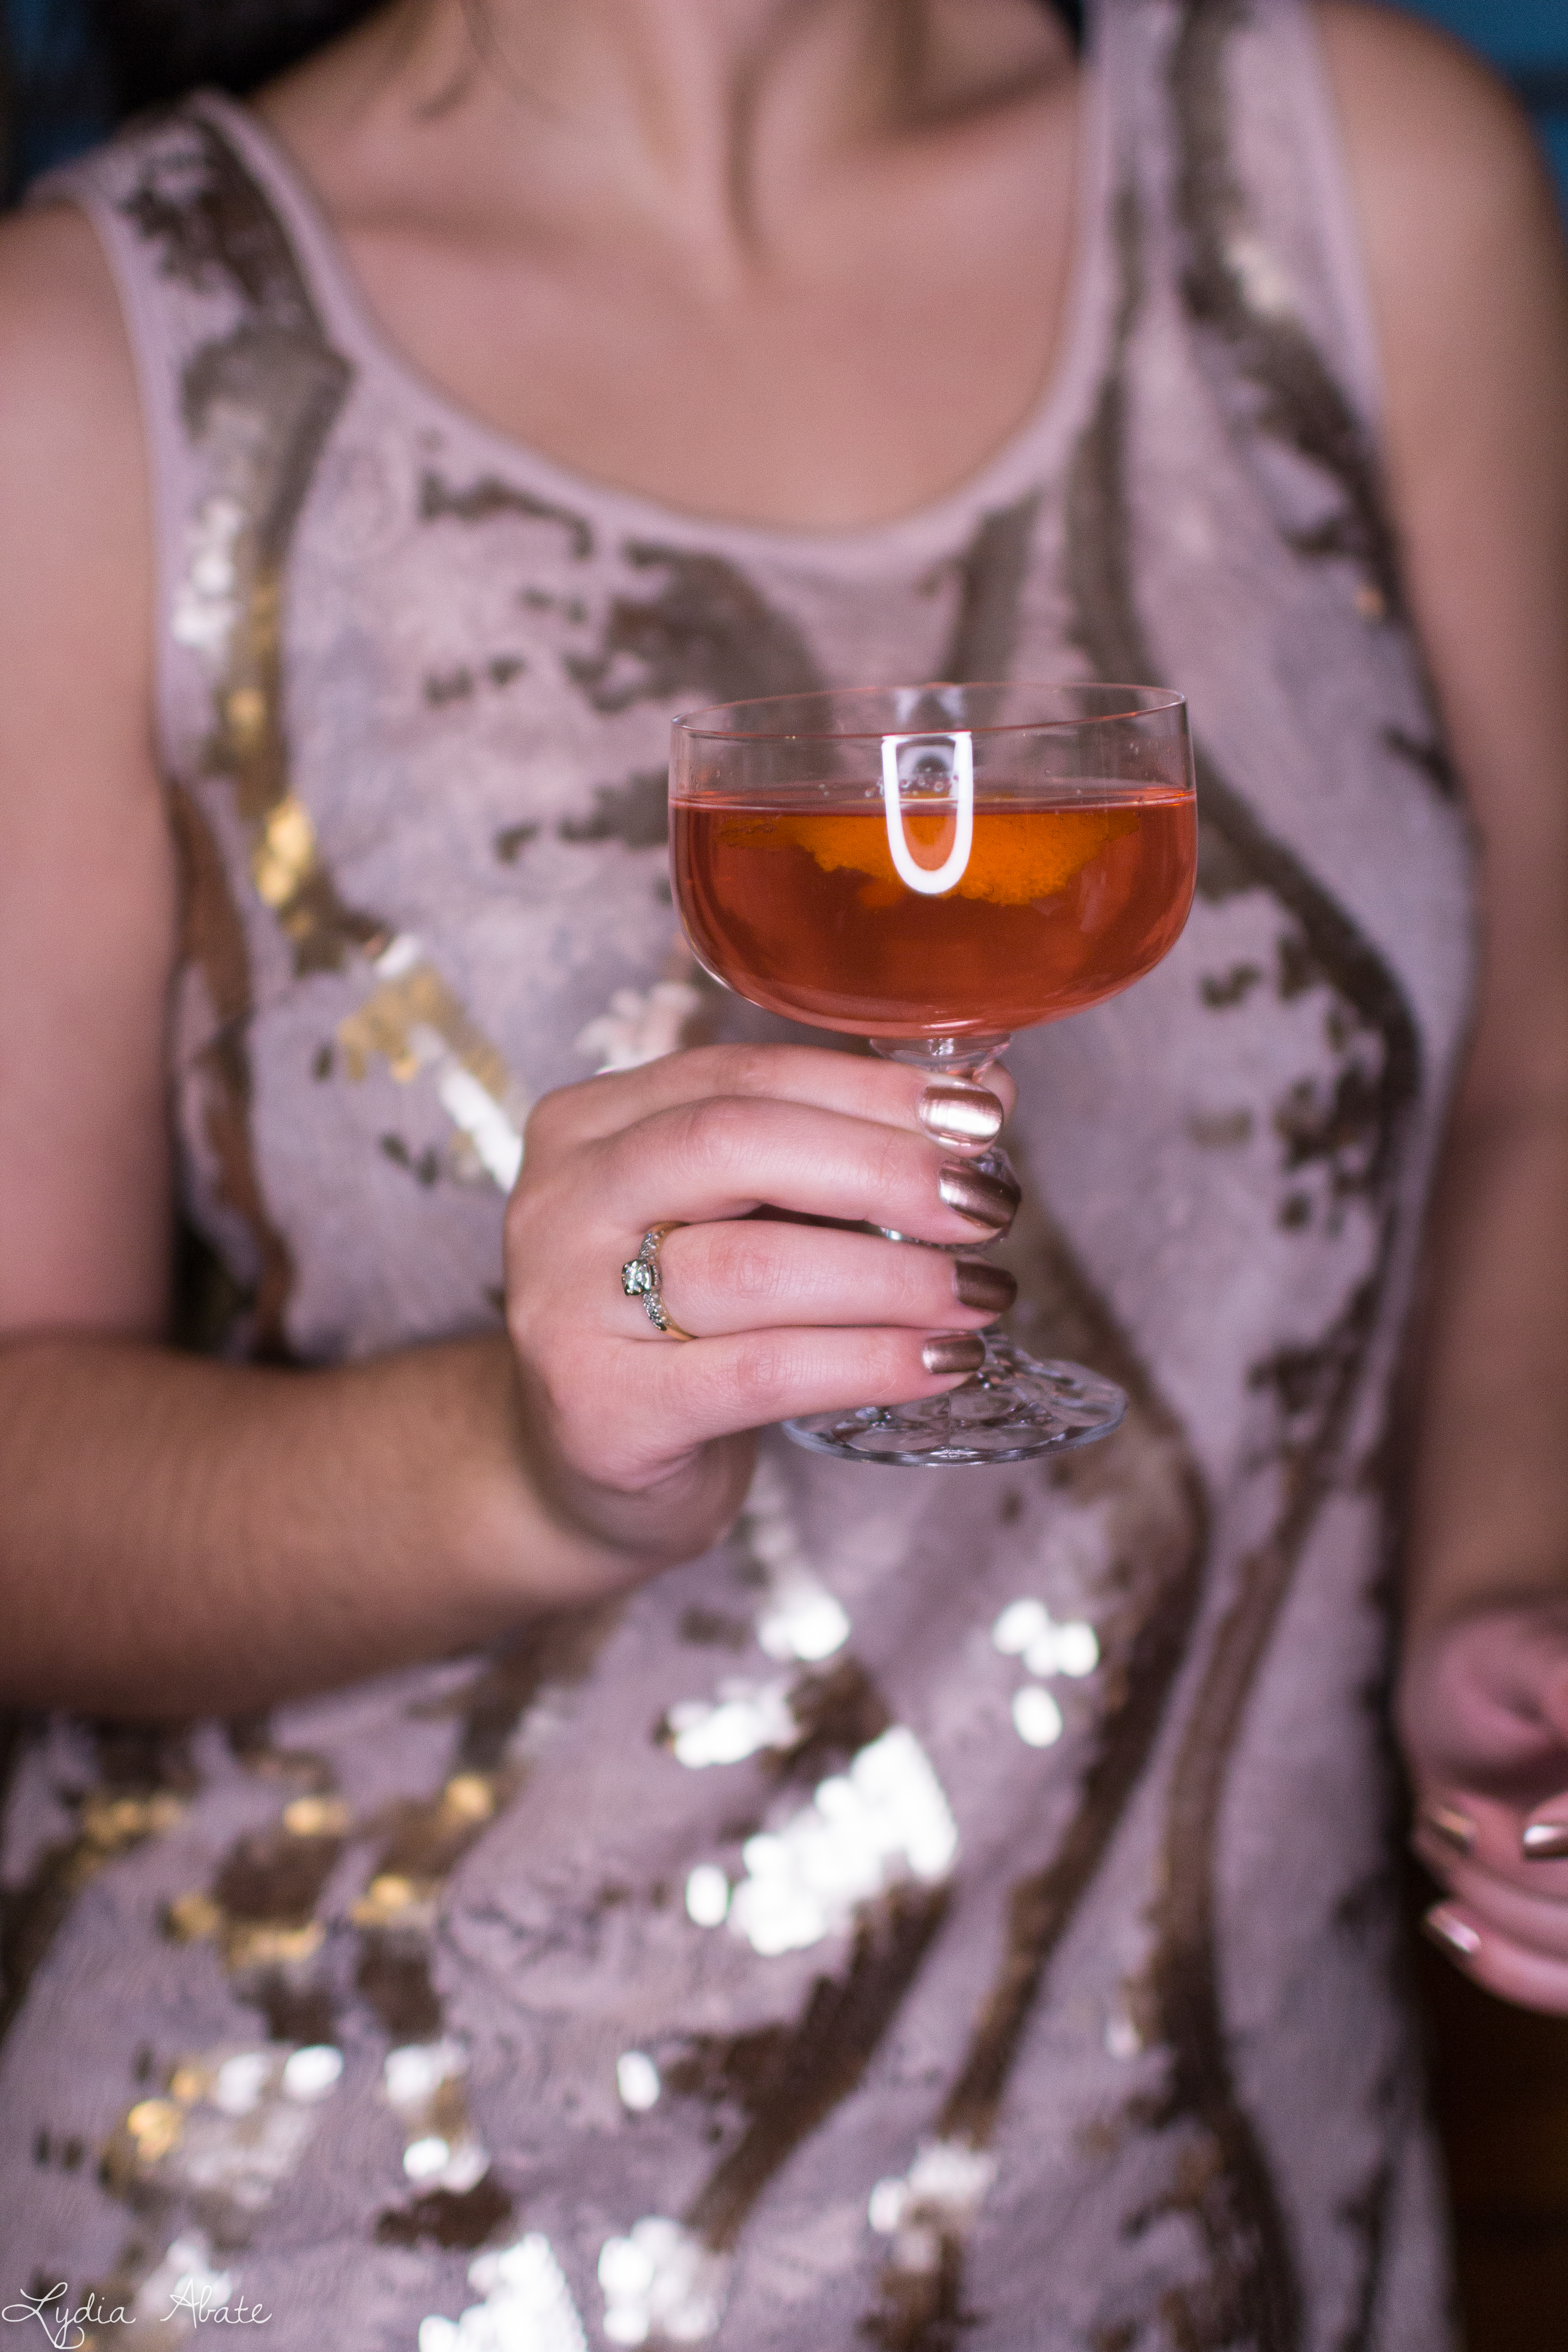
I really like making simple syrups, as the name implies they are easy, and a great way to impart a lot of flavor without too much fuss. I also was going for a coral color, as that was announced as the Pantone color of the year. I even found a rosé California champagne to further intensify the shade.

Finally, I dug up my grandmothers crystal champagne glasses to serve it in. A far cry from the plastic I'd initially purchased,  but certainly more fitting for this drink.

Cheers!

-Lydia

 b square vodka on the bar-2.jpg drink in hand-1.jpg b square vodka on the bar-1-2.jpg

Cranberry Orange Ginger Fizz


Ingredients:
Cranberry Orange Ginger Simple Syrup
1 cup granulated sugar
1 cup water
rind of one orange
handful of cranberries
one inch piece of fresh ginger, sliced
For the drink
two ounces of vodka
two ounces of cranberry orange ginger simple syrup
eight ounces of champagne or sparkling wine
ice
2 pieces of orange rind

Simple Syrup Instructions:
  1. Using a vegetable peeler, remove the rind from the orange, avoiding as much of the pith as possible. Remove the skin from the ginger and slice.
  2. In a small sauce pan, combine all the ingredients for the simple syrup and bring to a boil. Reduce heat and let simmer for 15 minutes.
  3. Strain the syrup using a fine mesh strainer and let cool.
Drink Instructions:
  1. Combine the vodka, simple syrup, and ice in a cocktail shaker, mix and pour into glasses.
  2. Top with the champagne.
  3. Peel two more pieces of orange rind, twist over each glass and drop in.

Thanks to B Square Vodka for providing me with their product to try. As always my views and opinions are my own.

Apricot Squares

I love holiday baking. I love the tradition, making the same cookies each year. Sure, I'll try a few which are new or different, but there is something about sorting through the handwritten recipes, yellowed with age and spotted with the remnants of spills and other mishaps which occurred over the years that feels special.

I wasn't looking for this apricot square recipe, it was only per chance that I decided to unfold the paper and see what was there. It was dated 11.21.01, and I could just picture myself sitting at the kitchen table in my best friend's house writing it out. This is her mom's recipe, and I loved them so much I asked her for it.

Even though I hadn't made them in years, the moment I saw it, I immediately wanted to make them, and they did not disappoint. Recipes like this one are the reason I wanted to create this blog.

-Lydia

 Apricot Squares Recipe-5.jpg Apricot Squares Recipe-3.jpg Apricot Squares Recipe-1.jpg Apricot Squares Recipe-7.jpg

Apricot Squares


Ingredients:
Shortbread Layer
½ cup of butter, softened
1 cup flour
¼ cup granulated sugar
Apricot Layer
¾ cup dried apricots
½ cup of chopped walnuts
2 eggs, lightly beaten
⅓ cup flour
¾ cup light brown sugar
½ teaspoon of baking powder
½ teaspoon of vanilla extract
¼ teaspoon of salt

Instructions:
  1. Preheat oven to 350° and line an 8"x8" pan with parchment paper - alternatively, grease the pan with butter.
  2. Combine all shortbread ingredients in the bowl of an electric mixer. Beat until crumbly, then press into prepared pan. Bake for 25 minutes or until golden.
  3. While shortbread is baking, place apricots in a pan with just enough water to cover, bring to a boil and then reduce, let simmer until plump, about 15 minutes. Drain, then chop.
  4. Combine all ingredients for the apricot layer, beat until just combined.
  5. Top the shortbread with the apricot mixture and return to the oven for 20 minutes.
  6. When cooled, top with powdered sugar if desired.

Summer Vegetable Pasta

Last week I visited Mike's Organic Delivery in Stamford, CT, a service that provides local, organic, and sustainable food, along with the ease of delivery (for anyone in a 20 mile radius of their Stamford location). I had to make the trek to pick up my bounty in person, but that afforded me the ability to shop as I normally would, impulsively.

I knew I wanted to get things to put together a meal, and naturally pasta is my go-to. There were only gluten free pasta options, but I was steered in the direction of the Edison quinoa and rice spaghetti. I can honestly say it exceeded my expectations, and did taste like the gluten filled pasta I love.

Next I found myself gravitating to the gorgeous little Italian Eggplants with the most beautiful coloring. On a bit of a purple kick, I got purple bell peppers, and purple onions. There were no purple cherry tomatoes, so I grabbed the yellow. I didn't want to risk getting a meat as I knew I had a long drive in traffic ahead of me, so I chose a bree-like cheese, Camembert. I also got little carrots, even though I wasn't sure how they would factor into a pasta dish (they didn't) but they were cute and went into a salad instead.

As for the actual prep of the meal, my initial thought was to simply roast the veggies. Simple, one pan lined with parchment for easy clean up. However it was 95° with 95% humidity, so that idea got nixed. Next I thought I'd put everything on the grill, with the tomatoes in a nice little foil packet. But it started to downpour as soon as I turned on the grill, and I was soaked through and through by the time the eggplants and peppers were done, so the rest was done in a saute pan. Everything worked out and the dish was delicious, even if the production was a bit disjointed! 

Thanks to Mike's Organic Delivery for providing the food for this recipe! I was given this opportunity through SiggPay, my views and opinions are my own.

 cooking with mikes organic food delivery-4.jpg cooking with mikes organic food delivery-10.jpg cooking with mikes organic food delivery-9.jpg cooking with mikes organic food delivery-1.jpg cooking with mikes organic food delivery-11.jpg cooking with mikes organic food delivery-6.jpg


Summer Vegetable Pasta


Ingredients:
1 Pint of Sun Gold Cherry Tomatoes
2 Red Tropea Onions
2 Purple Bell Peppers
4 Italian Eggplants
2 Cloves of Garlic
1/4 Teaspoon Salt
3 Tablespoons of olive oil
3oz Camembert
1/4 cup of reserved pasta water
1/2 pound of pasta of your choice


Instructions:
  1. Prepare water for the pasta. Pre-heat the grill.
  2. Prepare the vegetables; chop the onions, mince the garlic. Slice the eggplants and peppers into long strips.
  3. Coat the eggplants and peppers in a tablespoon of oil, salt, and pepper.
  4. In a large saute pan, heat the remaining oil and add the onions and garlic, cook until onions are tender.
  5. Add the tomatoes, cook until they have burst.
  6. Grill the peppers and eggplants, about two minutes on each side.
  7. Remove the rind from the Camembert and add to the saute pan. Leave the heat on low until it's melted.
  8. Add the pasta to the saute pan followed by the grilled veggies and toss until combined. Add the reserved pasta water to reach your desired consistency.
  9. Add salt and pepper to taste.

Pesto

I am a pasta lover, though and through. I would probably be content having pasta in one form or another every day of the week. However, once the basil comes up in the garden and there is enough for pesto, that is a special treat all on its own.

I've read plenty of pieces about how pesto should be made with a mortar and pestle, but I take no issue with my food processor pesto, and I'd rather have my sauce made in the time it takes for my pasta to cook.

This is the recipe my mom adapted years ago - she changed the nuts, the cheese, and most notably the quantity - the original was meant for double the amount of pasta!

Naturally I think this recipe is pretty much perfect, and of course it doesn't just have to be over pasta. I've added it to rice, pizza, and grilled cheese. Though it's important to remember that pesto is never supposed to be cooked, so it should be a last minute addition to any dish that is spending a lot of time under heat, and you can eat your leftovers cold out of the fridge.

-Lydia

 Pesto over thin linguine-5.jpg Pesto over thin linguine-6.jpg Pesto over thin linguine-1.jpg


Basil Pesto Over Thin Linguine


Ingredients:
2 cups of fresh basil (packed)
1/4 -1/2 cup of walnuts 
4 cloves of garlic
1/4 Teaspoon Salt
3/4 cup of olive oil
3/4 cup grated pecorino romano cheese
1/4 cup of reserved pasta water
splash of cream (optional)
1 pound of pasta of your choice


Instructions:
  1. Prepare water for the pasta. While the water is coming to the boil, prepare your pesto.
  2. Add the basil, walnuts, peeled cloves of garlic, and salt to a food processor. Pulse until roughly chopped.
  3. With the food processor on, slowly drizzle in the olive oil until everything is incorporated.
  4. Add the cheese, processing briefly, just until incorporated
  5. Add some of the pesto to the serving bowl and mix in a tablespoon of the reserved pasta water and cream if desired.
  6. Add the pasta to the bowl followed by the remaining pesto and toss until combined. Add more of the reserved water to reach your desired consistency. 
  7. Add salt and pepper to taste.

Swedish Meatballs

The first time I ever tasted Swedish meatballs was in the late 70's at a party.  I liked them so much that I asked for the recipe and have been making them ever since. My mother adopted it as well, making it for dinner for years, until it seemed to me to become a family favorite, and one that would remind me of home. Growing up eating basically Italian food, this was something different from the norm in my house, but everyone loved it. Through the years it has been tweaked. The original recipe had three kinds of meat; veal, pork and beef. I started out making it that way but have since opted to omit the veal. Sometimes when there was only beef in the my fridge, I have just used that. It may taste a bit different, but you can do it that way if need be! Unless you go to a butcher, pork usually comes in 1 lb. packages. If that is the case where you live you can take a portion out and freeze the rest for another use, or another batch of delicious meatballs! Wonderful in the cold winter months as a comfort food, it is equally good in any season.

Enjoy!
      Cindy

 Sweedish Meatball Recipe-2.jpg Sweedish Meatball Recipe-6.jpg Sweedish Meatball Recipe-7.jpg Sweedish Meatball Recipe-4.jpg

Swedish Meatballs


Ingredients:
1 lb. lean ground beef
1/2 lb. ground pork
3/4 c.breadcrumbs
1/2 c. minced onions
1 1/2 tsps. worcestershire sauce
1 tsp. salt
1/8 tsp pepper ( or to taste )
1 egg
2 tsps. fresh parsley, chopped fine
1/2 c. milk


Instructions: Sauté onions a few minutes until softened. Set aside. Place meat in a large bowl and add the breadcrumbs, onions, Worcestershire, salt and pepper, egg, parsley,and milk. Mix well until breadcrumbs are thoroughly combined. Chill for 2 hours Shape meat into small balls. Fry in a large frypan in 1/4 cup of oil until browned on all sides. Remove and set side while making sauce in the same pan:

1/4 c. flour
1 tsp. paprika
1/2 tsp. salt
pepper to taste
3/4 c.sour cream
2 cups water
1/4 tsp worcestershire


On medium low heat, stir flour into the drippings until flour has cooked for a minute or two. Blend in the water a small mount at a time alternately with the sour cream. Stir rapidly until smooth Add worchestire sauce. Boil for 1 minute. Add meatballs and heat together on low heat.
May be served with rice, egg noodles, of pasta of your choice, and a vegetable on the side.


Salad with Balsamic Vinaigrette

You might think that the name 'Cooking in Cashmere' is meant in a metaphorical sense or even in a satirical sense, but you would be wrong, it's completely literal. I can't tell you the number of times my mother has berated me for not changing my clothes before cooking, and it should come as no surprise to you that I splashed balsamic dressing on my cashmere cardigan. At least it's charcoal grey right?

On to the salad. When trying to write down this recipe we realized that it's more of a template than a recipe, it changes to whatever you have on hand, or whatever you love. I adore goat cheese in a salad, my mother can't stand it, sometimes we make it with baby spinach or whatever is in that giant box of greens at Costo called "spring mix". We swap apple for pear, or when we are feeling really fancy and indulgent, candy the nuts.

It's really the dressing that is important, and there are somethings we just feel very strongly about. Use a 2:1 ratio of oil to vinegar and don't skimp on the salt. The flavor of the garlic is great, but don't leave the clove in the salad - no one wants that bite - especially my mom. We also don't get crazy about the balsamic vinegar. I've bought the $50 bottle from Whole Foods and while it's nice, I don't like feeling as though my vinegar is some precious commodity - the two pack of the Costco brand is great and lasts forever.

Mix it up, play around with the add-ins, and enjoy!

-Lydia

 Balsamic, Apple, Crasin, Peacan, Feta Salad.jpg Balsamic, Apple, Crasin, Peacan, Feta Salad-11.jpg Balsamic, Apple, Crasin, Peacan, Feta Salad-12.jpg

Salad with Balsamic Vinaigrette


Ingredients:
1 Head of Romain Lettuce (approx. 7 oz) (according to my kitchen scale)
1 Medium Apple (Fuji, Gala, Honeycrisp)
2-3 oz Crumbled Feta Cheese (I'd go 3, obviously)
1/4 Cup Crasins
1/8 Cup Coarsely Chopped Pecans

Vinaigrette
4 Tablespoons of Olive Oil
2 Tablespoons of Balsamic Vinegar (we love the Kirkland signature balsamic)
1/4 Teaspoon Kosher Salt (use less if using a finer crystal salt)
1 Small Clove of Garlic


Instructions:
  1. Peel garlic clove and either score with a knife, or just cut in half. Combine in a small bowl with oil, vinegar, and salt. Allow to sit while preparing the rest of the salad.
  2. Wash the lettuce, gently dry with a paper towel. Tear up the leaves into small pieces and place into the serving bowl.
  3. Peel, core, and slice the apple; crumble the feta; chop the nuts.
  4. Add all to the serving bowl along with the crasins.
  5. After the vinaigrette has had at least 10 minutes to sit, remove the garlic clove. Pour over salad, toss and serve.

Italian Tomato Sauce

When it comes to food traditions, what is better than Sunday Dinner? For us, that means a pot of sauce simmering on the stove, soon to be spooned over pasta - vermicelli or capellini if we have our way. This is the recipe of our family, and while we've come to realize that every Italian family likely has their own special recipe they would never dream of deviating from, we wanted to share ours all the same.

This will be the first of several Sunday Dinner recipes to share, and the base of many future recipes as well.

-Cindy & Lydia

 Italian Tomato Sauce Recipe-9.jpg Italian Tomato Sauce Recipe-7.jpg


Italian Tomato Sauce


Ingredients:
2 28 oz cans of whole Italian plum tomatoes (no puree, but with basil is okay)
3 oz Italian tomato paste
1/3 cup of olive oil
4 whole cloves of garlic
8-10 leaves of fresh basil or half a teaspoon dry
1 1/2 teaspoons salt or to taste
1/4 teaspoon freshly ground black pepper or to taste

Special Equipment
Food Mill
Flame Tamer

Instructions:
  1. In a 4 quart sauce pot on low, heat olive oil. 
  2. Add the whole garlic cloves, and allow to slowly sauté until golden. If cloves are not completely submerged, I like to use the flame tamer to prop the pot up at an angle. Do not allow to brown. Approximately 10-15 minutes depending on the size of your cloves. 
  3. Place food mill over pot and turn heat up to medium. You want it to be hot enough that the tomatoes will sizzle a bit when you put them in.
  4. Run the tomatoes through the mill until nothing remains in the mill but skins and seeds.*
  5. Add in basil, paste, salt and pepper.
  6. Bring to a boil, then lower the heat to simmer, and place flame tamer** under pot.
  7. Simmer with lid slightly ajar for 1 1/2  hours, stirring occasionally. Adjust seasonings to taste.

*If you don't have a food mill, run the tomatoes through the blender briefly. If you prefer a chunky sauce, put the tomatoes in a bowl first and crush with your hands.

**If you don't have a flame tamer, be diligent about the stirring, you don't want it to burn in the middle.

Chocolate Lemon Pie

Chocolate Lemon Pie for me, is one of those things that conjures a combination of memories, mostly of my fathers love for it. He was almost joyous in his cutting of the first piece, sometimes singing or whistling a little tune. I only found out in recent years how very special that pie was, and is still. It seems like it is only really made in Connecticut. I found it a few years back in a bakery and was so excited to taste it after not having it for so long. I have also learned that is is made at the Twin Pines Diner in East Haven. I had had it in my mind to make it as I knew the ingredients were simple and I would be able to recreate the recipe that was in my mind. So, when Lydia told me about Pie Day, this was the perfect time to give it a try. I think it came out delicious and my father would be very pleased.

-Cindy


 Chocolate Lemon Pie Recipe-11.jpg Chocolate Lemon Pie Recipe-2.jpg Chocolate Lemon Pie Recipe.jpg Chocolate Lemon Pie Recipe-12.jpg Chocolate Lemon Pie Recipe-14.jpg


Chocolate Lemon Pie


Ingredients:
Pie Filling
1 double pie crust (homemade or store bought)
1¼ cups sugar
2¼ tablespoons flour
3½ tablespoons cornstarch
pinch of salt
2 tablespoons powdered lemon pie filling
12 ounces water
2 fresh lemons, zested and juiced
5 egg yolks, lightly beaten
1 tbsp butter
Chocolate Ganache
¼ cup heavy cream
4oz ( by weight) semi sweet chocolate chips
1 tbsp corn syrup

Instructions:
  1. Mix sugar, flour, cornstarch, salt, pie filling and water in pan on low heat. When mixture thickens, add lemon juice, zest and egg yolks. Stirring constantly over medium heat, bring just barely to a boil. Mixture should be very thick.
  2. Remove from heat and sir in butter.
  3. While filling cools, roll out pie crusts and place bottom crust into a 9" pie pan.
  4. Add filling to pie, place top crust on, folding it under the bottom crust to seal.
  5. Bake on the middle rack of a 350° oven for 35 minutes, or until crust is golden.
  6. Prepare ganache by placing chocolate chips into a medium size bowl, then heat cream to barely a simmer. Pour over chocolate and allow to sit undisturbed for five minutes. Whisk to combine,  add cornstarch, and allow to cool.
  7. When pie has cooled, spread chocolate ganache over top.
  8. Keep refrigerated.

Recipe adapted from the New Haven Register